How it works
Set up LyncMail in about 15 minutes
Here's every step with real screens: create your account, connect your checkout, switch on your automatic emails and send your first campaign. Selling to other businesses? Step 5 shows how to connect your email for Outreach.
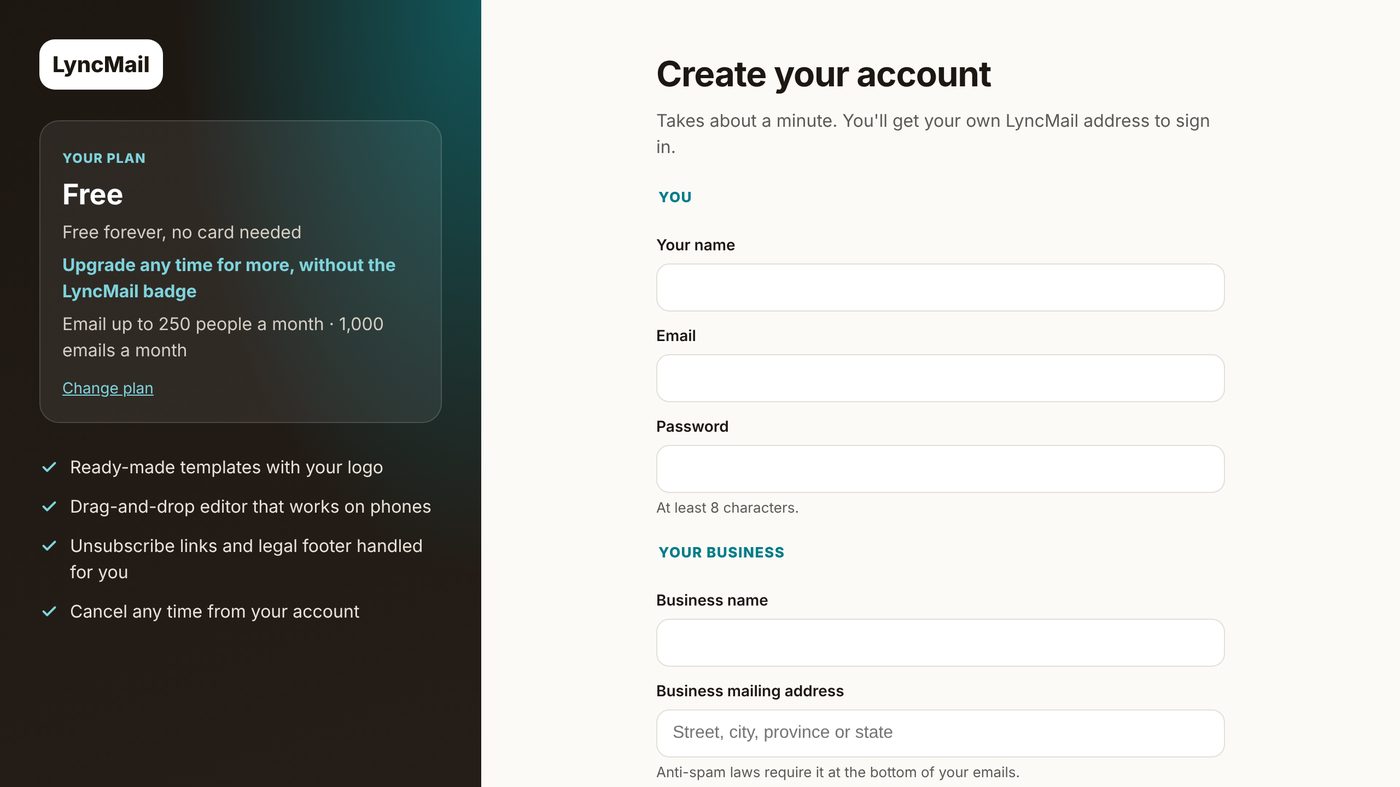
Create your free account
Takes about a minute. No card needed on the Free plan, and paid plans start with 14 days free.
- Choose a plan on the pricing section and click Start free.
- Enter your name, email and a password.
- Add your business name and mailing address. LyncMail adds it to the bottom of every email for you.
- Pick your LyncMail address, like
yourbusiness.lyncmail.com. That's where you'll sign in. - Open the "Confirm your email" message we send you and click the button. You can set everything up right away; sending to your customers starts once your email is confirmed.
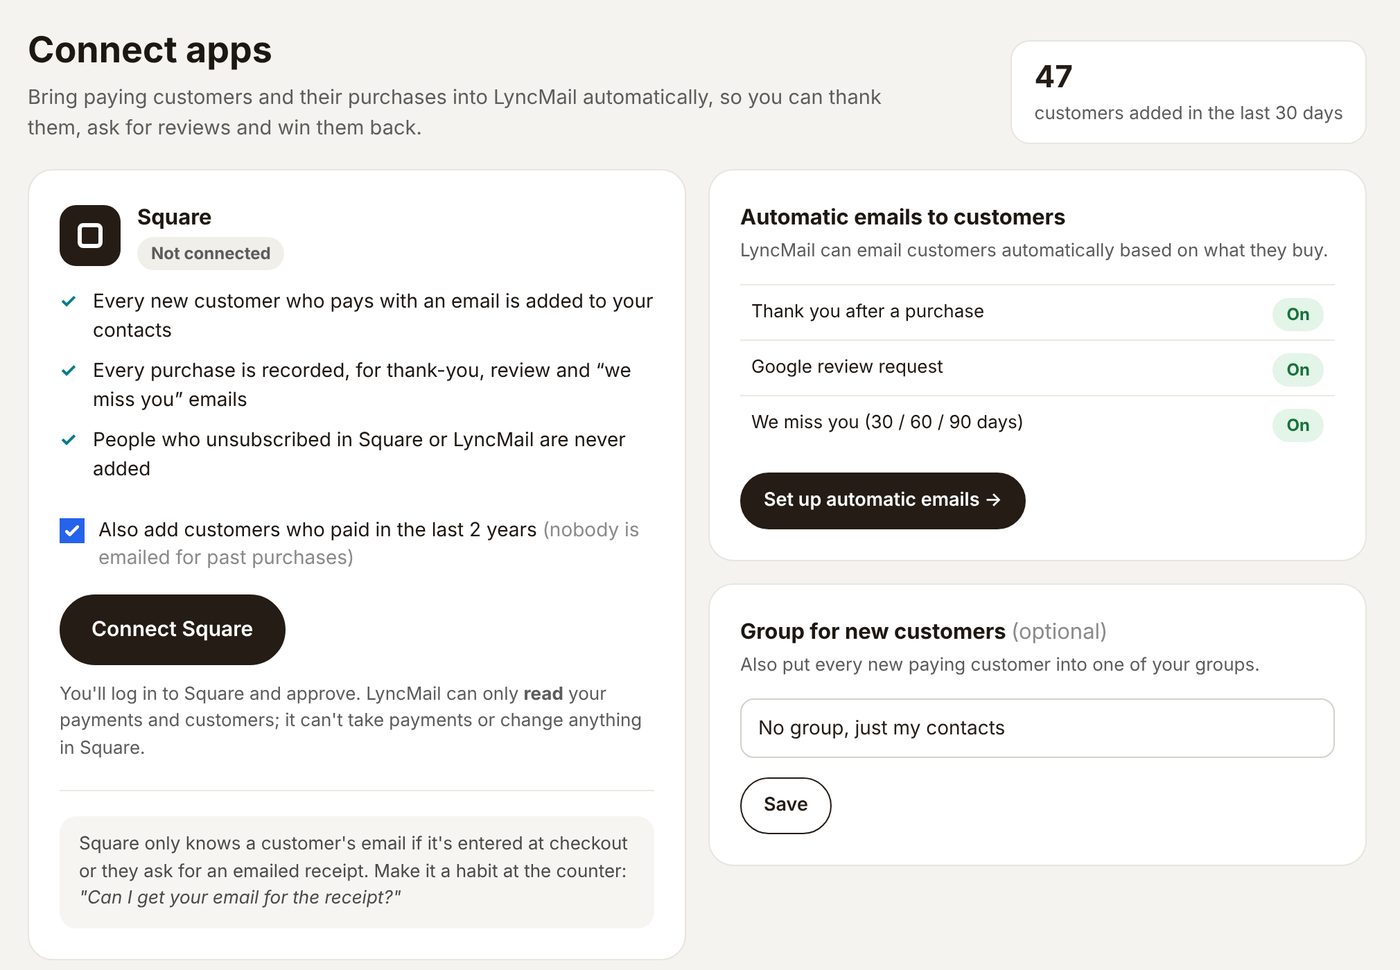
Connect Square or WooCommerce
Every paying customer with an email joins your list automatically, with their purchase history. No more spreadsheets.
- In your account, go to Contacts → Connect apps.
- Square: click Connect Square, log in to Square and approve. LyncMail can only read your payments and customers; it can't take payments or change anything.
- WooCommerce: copy your private web address from the WooCommerce card, then in WordPress go to WooCommerce → Settings → Advanced → Webhooks → Add webhook, set the topic to Order updated and paste the address. About 2 minutes.
- Something else? Upload your customer list as a CSV in Contacts → Import & export. Exports from Square, Shopify, QuickBooks, Excel and Google Sheets work as they are.
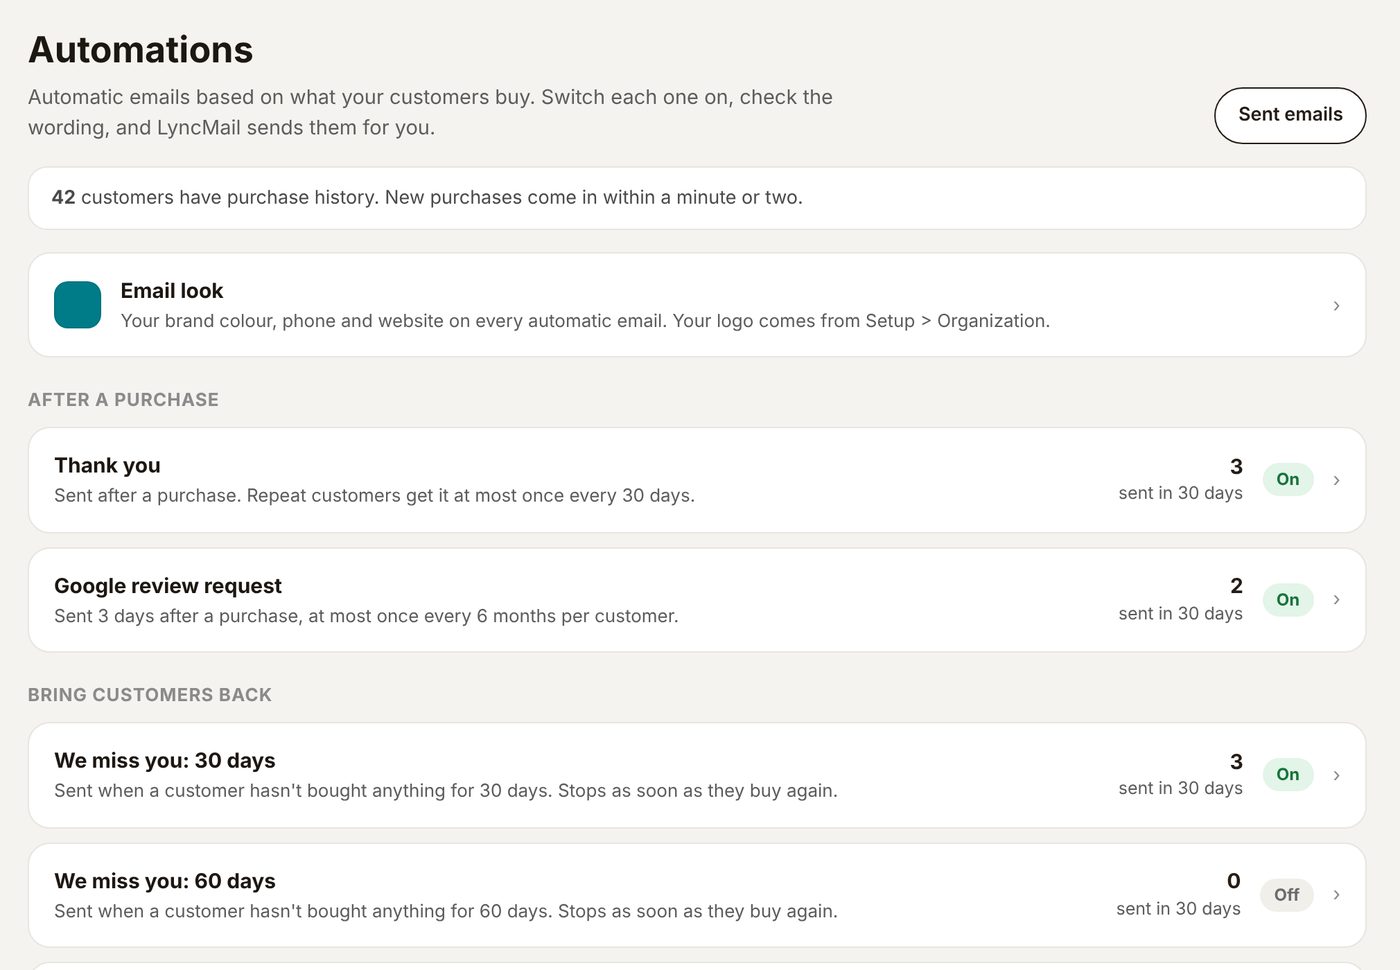
Switch on your automatic emails
The emails that bring customers back, sent for you based on what they buy.
- Go to Automations.
- Open Thank you, check the wording and tick Send this email automatically. It goes out after each purchase.
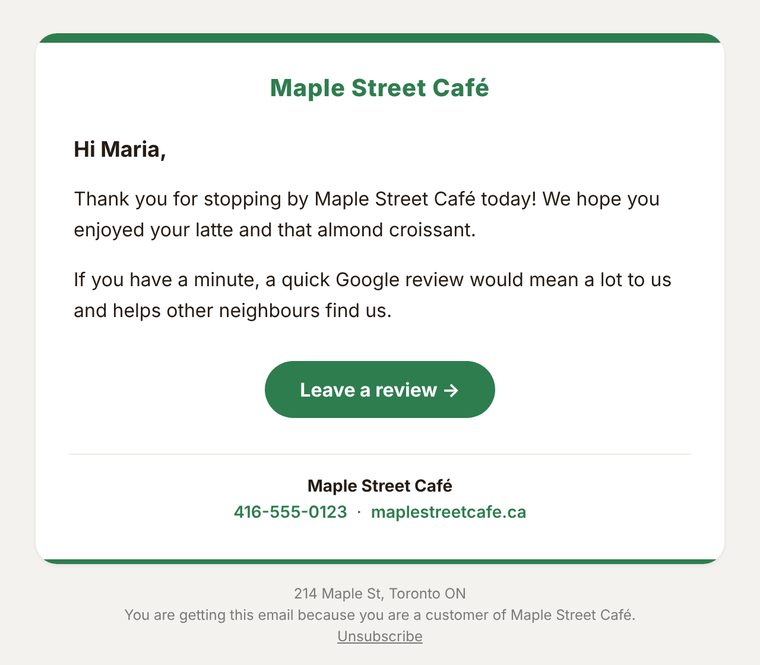
- Open Google review request, paste your Google review link and switch it on. Customers get a one-tap review button a few days after they buy.
- Switch on We miss you for customers who haven't been back in 30, 60 or 90 days. It stops as soon as they buy again.
- Open Email look to set your brand colour, phone and website, add a photo to each email, then use Email me a test to see it in your inbox.
Send your first campaign
Newsletters, sales and seasonal offers, ready in minutes.
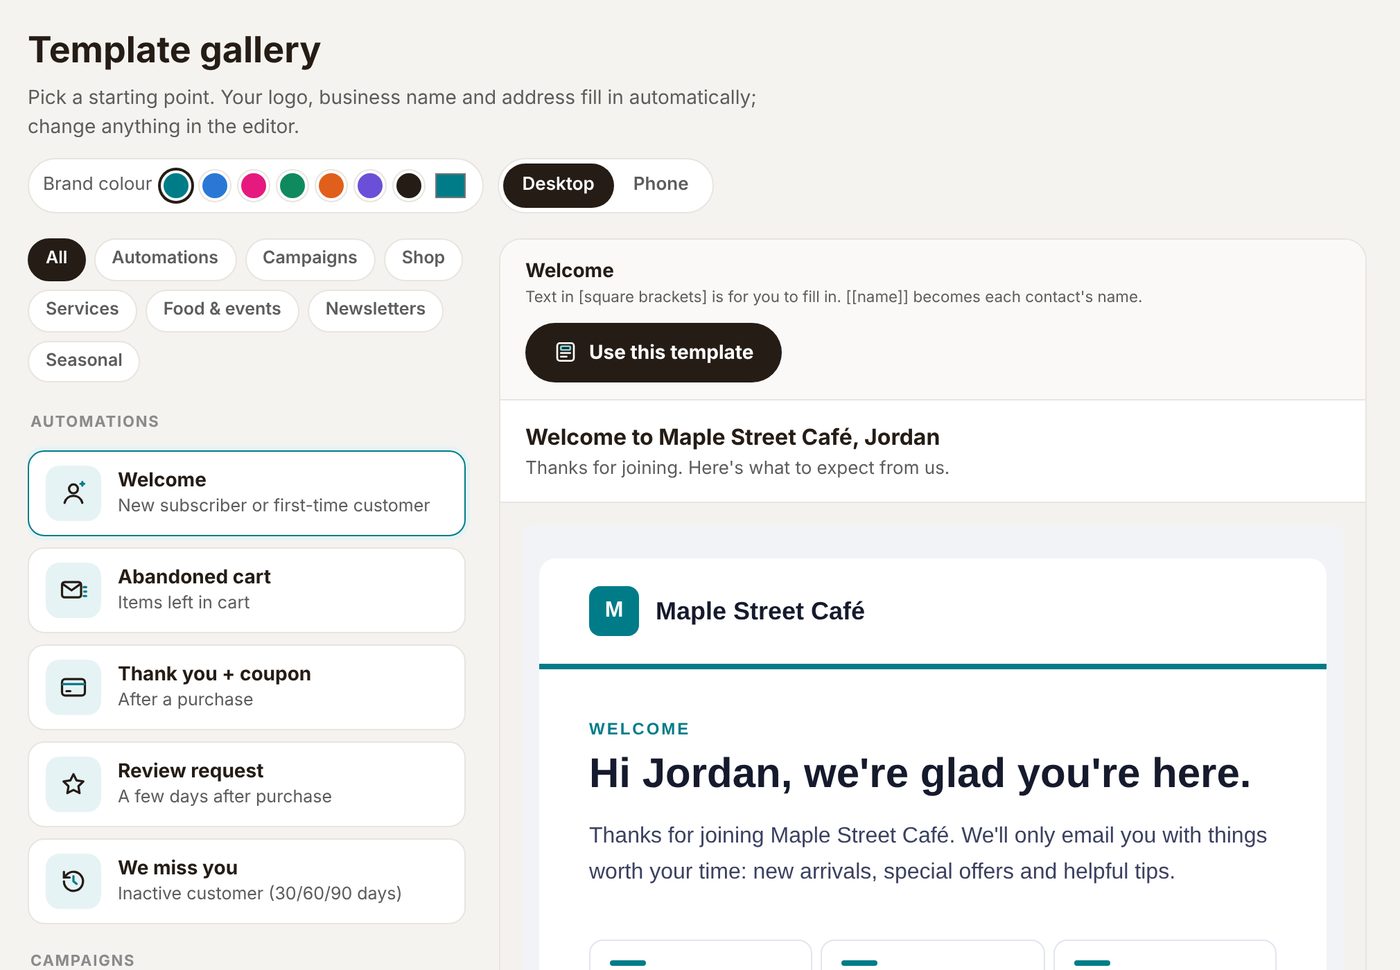
- Go to Templates and pick a starting point. Your logo, business name and address fill in automatically.
- Change the words and photos in the drag-and-drop editor, or ask LyncMail AI to write it for you.
- Go to Campaigns → New campaign: choose who gets it, add a subject line and choose your email.
- Send yourself a test, then click Send now or Schedule for a later time.
Connect your email for Outreach Add-on
Outreach finds local businesses that fit, writes a personal first email to each one and sends it from your own email address, a few a day. Replies land in your normal inbox. To do that, LyncMail needs to connect to your mailbox once.
- Go to Outreach → Mailboxes → Connect a mailbox.
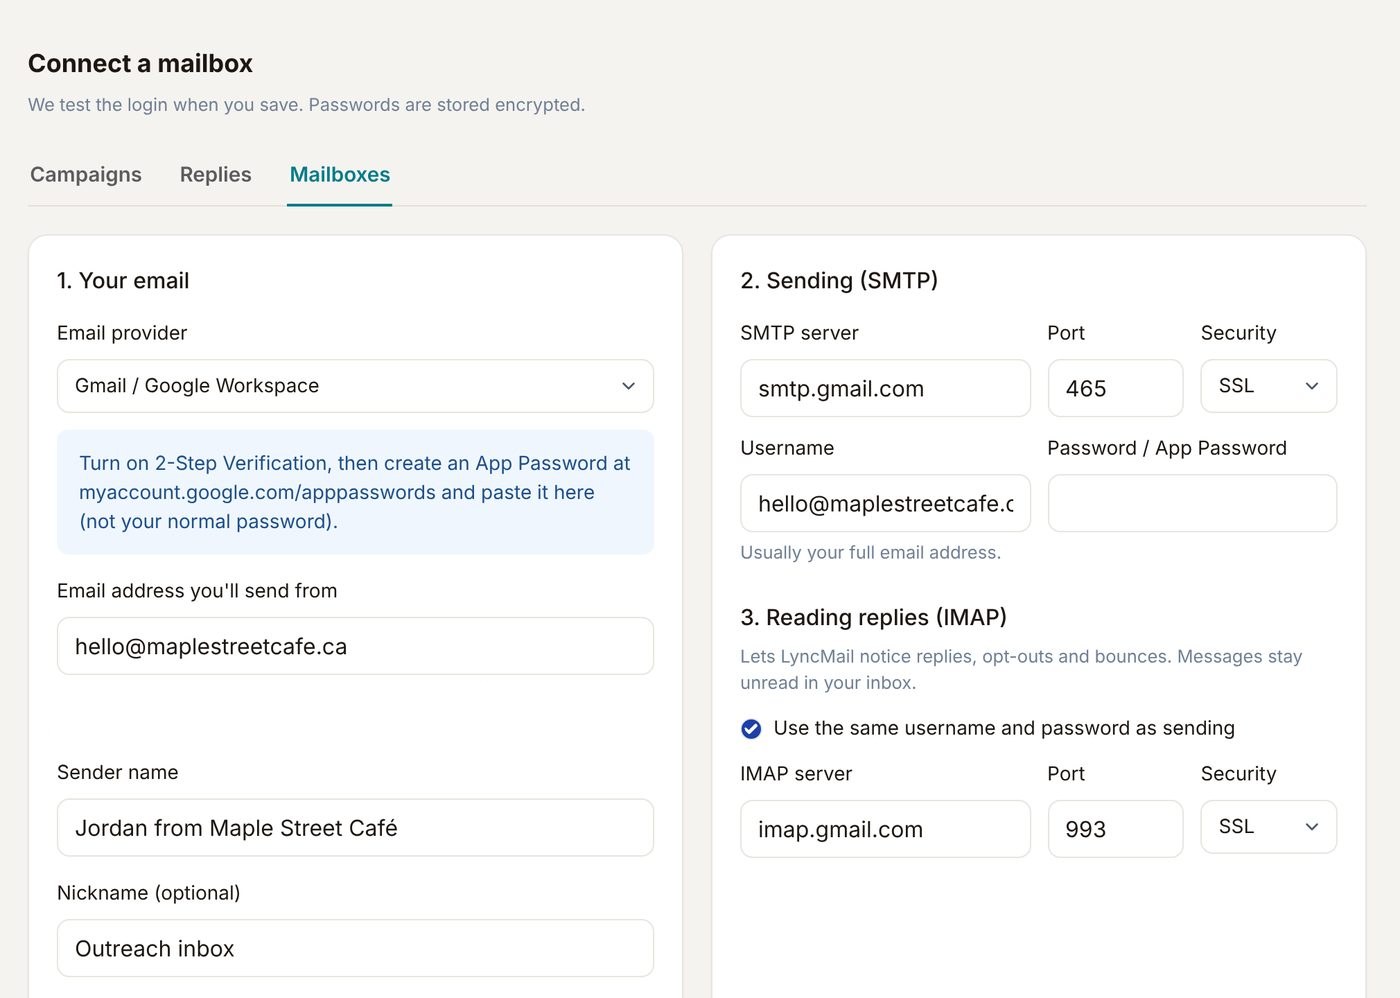
- Choose your Email provider. The server settings fill in for you.
- Enter the email address you'll send from and the sender name people will see, like "Jordan from Maple Street Café".
- Add your business mailing address (required by anti-spam law) and your signature details: title, phone, website and logo.
- Enter your username (usually your full email address) and password or App Password (see below), then click Save. LyncMail tests the login straight away and tells you if anything is wrong.
Gmail or Google Workspace
- Turn on 2-Step Verification at myaccount.google.com/security.
- Create an App Password at myaccount.google.com/apppasswords. Name it "LyncMail".
- Copy the 16-letter password and paste it into LyncMail. Use this, not your normal Gmail password.
Outlook or Microsoft 365
- Use your full email address and password.
- Your Microsoft 365 admin must allow Authenticated SMTP for this mailbox: in the Microsoft 365 admin centre, open the user, then Mail → Manage email apps.
- If your account uses 2-step sign-in, create an app password in your Microsoft security settings.
Hostinger Email
- Use your full email address.
- Use the mailbox password you set in hPanel → Emails. Forgot it? You can reset it there.
Other providers (cPanel, Zoho, GoDaddy…)
- Choose Other and ask your email host for the SMTP (sending) and IMAP (reading replies) server names and ports.
- Most use port 465 with SSL for sending and 993 with SSL for replies.
Ready to try it?
Start on the Free plan. No card needed. Stuck on a step? Email [email protected] and we'll set it up with you.